In the last dispatch I wrote about my story of how I learned that sketches aren’t meant to be perfect. How they aren’t meant to give final answers. They’re meant to ask further questions. To doubt your own solutions. And with that comes a lot more sketching. Sketching is not something you do at the start of the process, produce a wonderful looking sketch and move on. Sketching needs to be done throughout the design process. And in order to produce more sketches quicker, the quality of sketching needs to move aside. Here’s quick overview of my sketching kit followed by a few tips to make sketching serve its true meaning in your design process.
Start with a sharpie
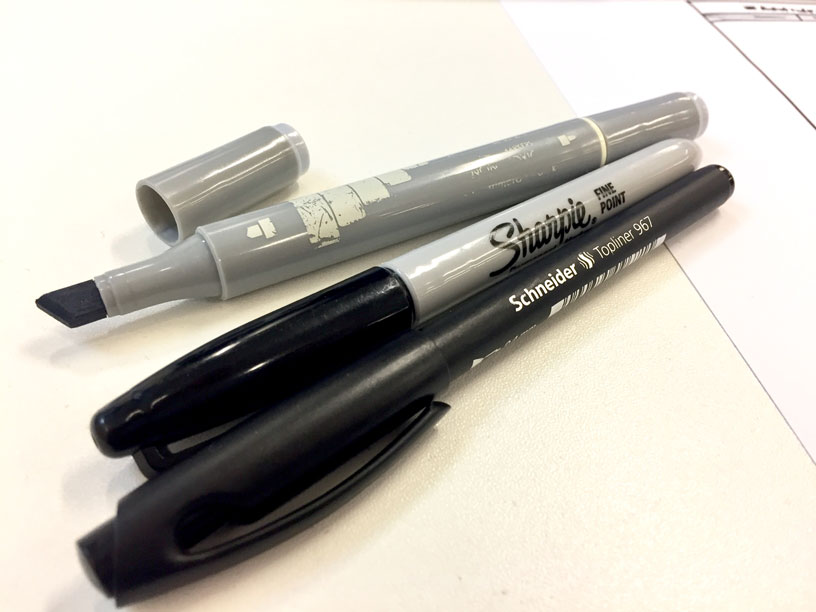
Some designers will use a pencil to start drawing their early sketches. They do so because their ideas aren’t clear yet. So they draw an interface, see it’s not right, erase parts of it and draw them again. This is a great way to start spending too much time on one sketch only and start thinking about details way too early. My recommendation is don’t use a pencil and an eraser. Use a sharpie instead. Or something similar, as long as the tip of the pen is thick and will produce thick lines. This will force you to not focus on details and to make mistakes. Mistakes that you can’t erase. So to fix a mistake you have to draw a new version of the sketch. I know, you’re probably thinking: “but that’s a waste of time!” Here’s the tricky part. These early sketches should be so simple that it takes you very little time to produce. By little time I mean less than a minute. If it’s not the right solution you just discard it without feeling sorry for wasting effort.
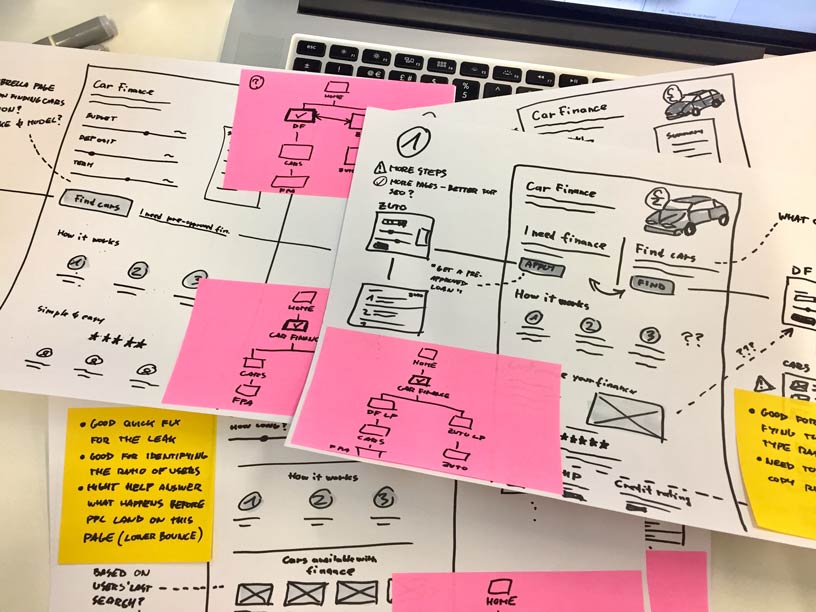
At this stage, it’s important that you try to explore different ideas, solutions, combinations of different UI elements and interactions. Once you have that in front of you, you’ll start seeing patterns and connections that you couldn’t see before. You might want to try and combine a few sketches into one.
Pro tip: try to sketch on a large canvas like a big paper, a whiteboard or a even a wall. Don’t use a small notepad. This will make you even faster and you’ll have a nice overview of your progress.
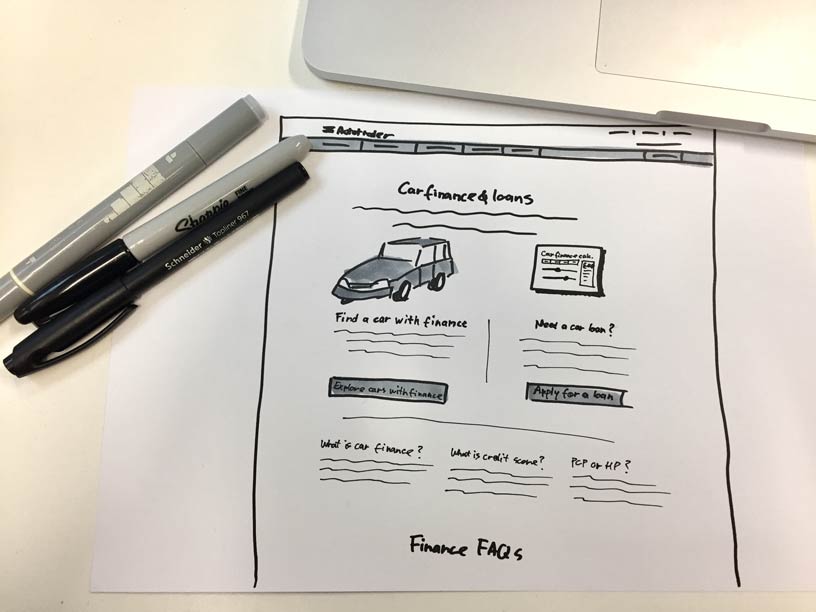
Converge and add (some) details
You should be more comfortable with what you produced through sketching at this point. You’ve explored different ideas, layouts, UI elements… You might have combined some of them already and there’s probably a version of the sketch or two that you think might be the right ones. But there’s still lots of questions. It’s time to draw a bit more detailed sketches. Here’s where my Schindler and shader pens come in. The title that was just a wavy line before now becomes actual text. The paragraphs are still wavy lines. The UI elements become more detailed as well. The button is not just a dark box, it’s a box with text and some shading. You might even add some (basic) representations of icons at this point. It’s ok to spend more time on these sketches. It’s ok because you’ve already answered a lot of questions. At this point, the only way to start answering more questions is to add details. And it’s ok to do so because you narrowed down your solution to one or two sketches earlier.